Thursday, July 26, 2012

ok, but also this one!

Vertical Layer Rose Cake
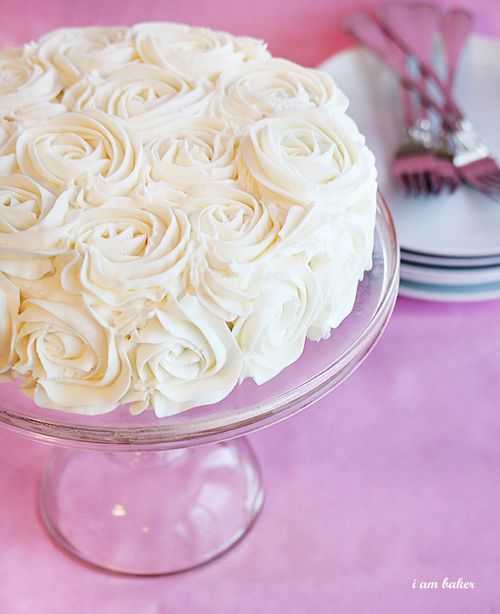
I have been dreaming about this cake for about a month.
IMG_8836.stamp
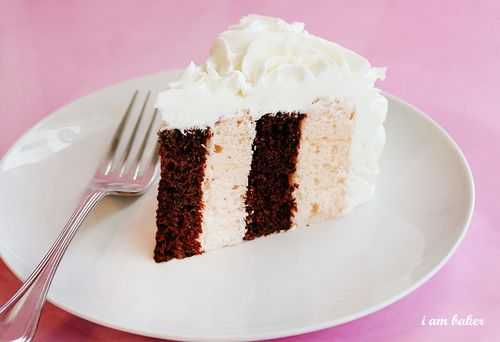
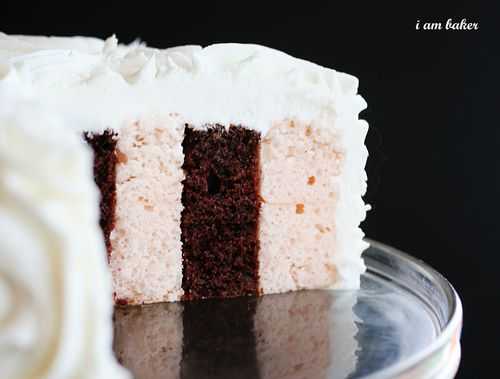
Dreaming of layers that went up and down instead of horizontally.
IMG_8950.stamp
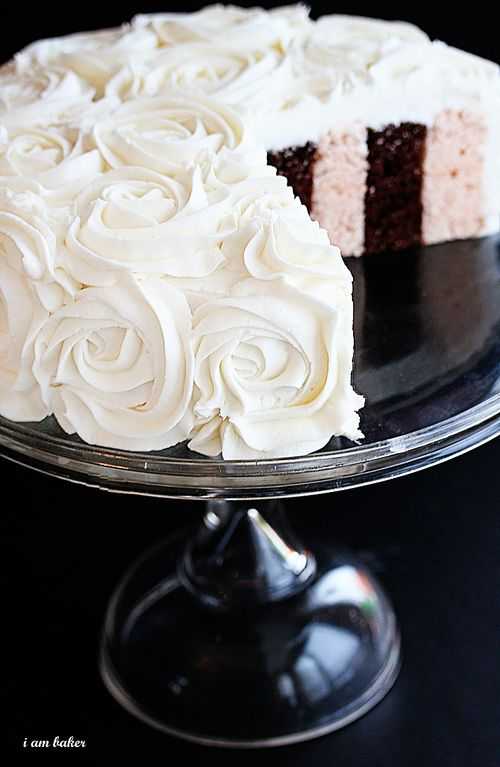
Dreaming of obscene amounts of delicate frosting roses.
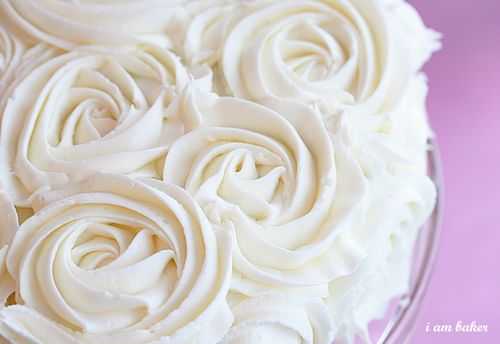
IMG_8855.stamp
Dreaming of a variety of flavors.
IMG_8886.stamp
And finally, my dream has come true.
IMG_8958.stamp
Normally I share recipes and techniques and design aspects and every detail I can think of sharing… and maybe I will do that if anyone cares to know. But for now, I just want to enjoy it.
Why?
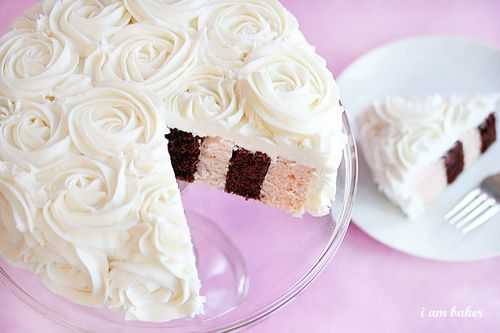
IMG_8895.stamp2
Because tomorrow (Feb. 1st) is my birthday. And I wanted to make myself a cake! (thats me getting sassy with myself)
I just want to sit back, relax, and have a piece.
But I do wish I could share it with you.
Cause man oh man…
It. Is. Good.

and the tutorial...

Rose Cake Tutorial

SO excited to share with you how easy it is to make the rose cake. (Video tutorial here.  In four minutes I frost an entire three layer Rose Cake!)
Seriously, once you see you are going to run right out, buy a 1M tip, and make one.
That or go back to work. Or bed. Or whatever it was you were doing before I interrupted you.
Ok, here we go!
There were two main components to this cake.
The vertical layer interior and the frosting rose exterior.
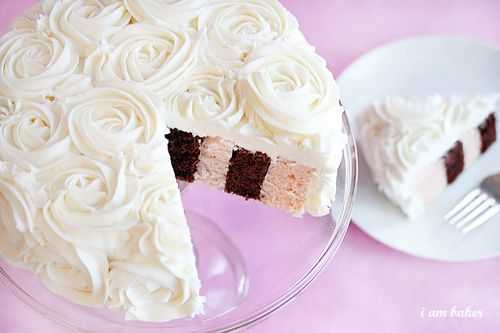
Rosecakevertical
I am going to do a vertical layer tutorial at a different time, (updated: you can see it HERE) as I did not get any pictures of it this go around and it is IMPOSSIBLE to explain without pictures. What I can tell you is, I did not make a sponge cake that I simple rolled up. I actually made two separate cakes and assembled them into the vertical layer pattern.
Now for the frosting rose tutorial!
I promise you, this could NOT be easier. Bakers have been putting frosting roses on cupcakes forever by simply using a 1M decorators tip. That is all I did!!
(I need to mention… before I froze my cake I poured a simple syrup over it. This helped to retain moisture as well as assist in binding the layers together… just be careful to not use to much!)
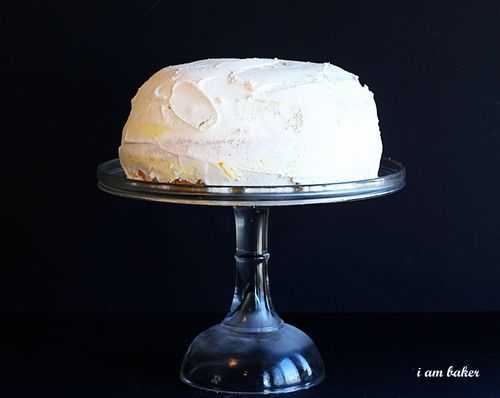
Start with your cake. I put a good crumb coat on… as in, a crumb coat that conceals the cake underneath. It can be sloppy and uneven, but you should not be able to see what color the cake is.
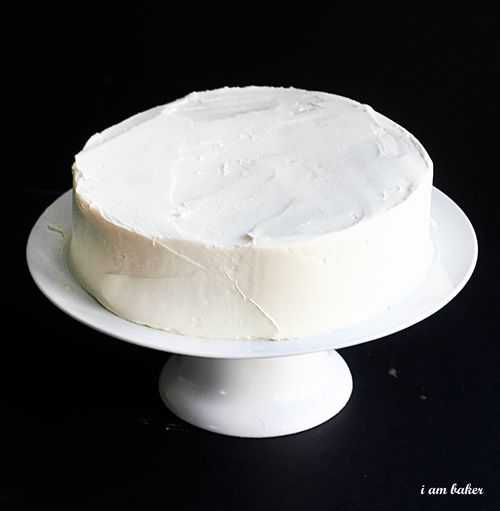
IMG_9013.stamp
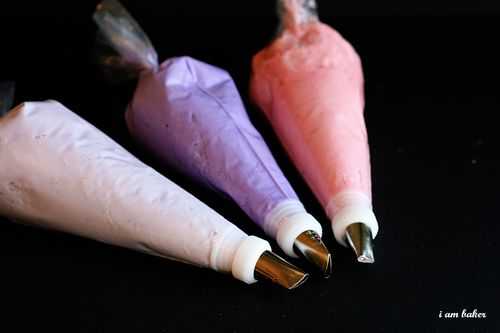
Put your 1M tip (or any large open star tip) into the pastry bag then fill it up with buttercream frosting.
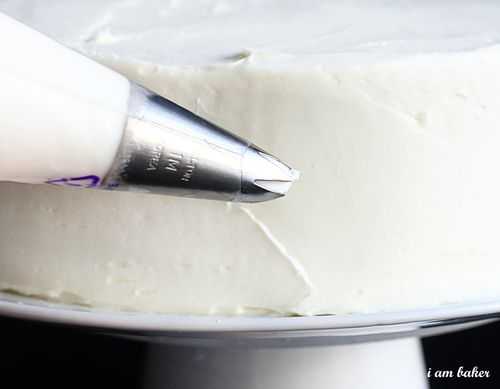
IMG_9017.stamp
If you have an appropriately sized coupler you can use that, or you can just insert the tip into the bag and cut off the excess.
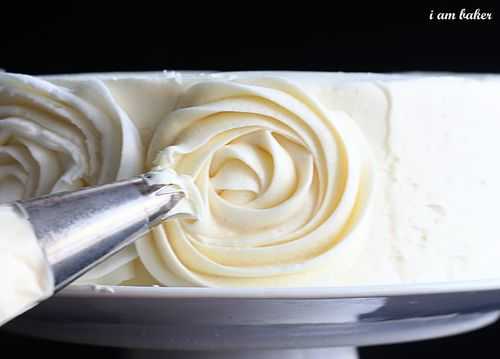
IMG_9019.stamp
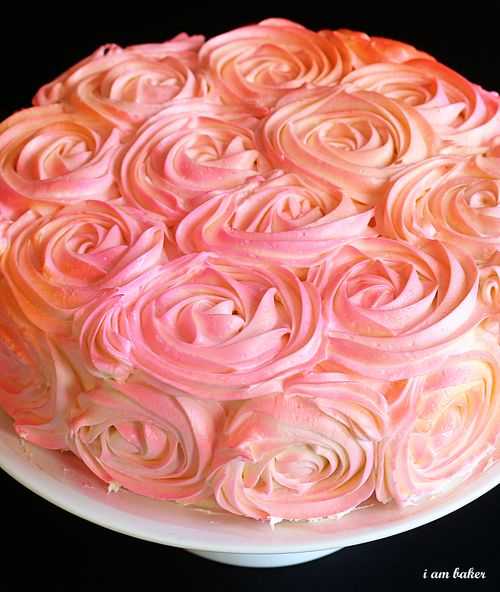
To make your rose, start in the center, then slowly move your tip in a circle around the center point. I wanted a single rose to span the side of the cake so I looped around my center point twice.
Try to end in the same place each time.
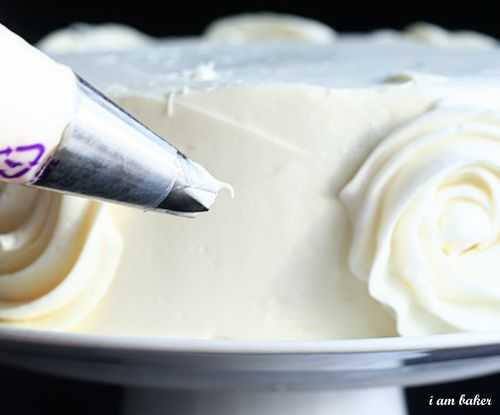
IMG_9020.stamp
Go all the way around the cake and complete with one last rose!
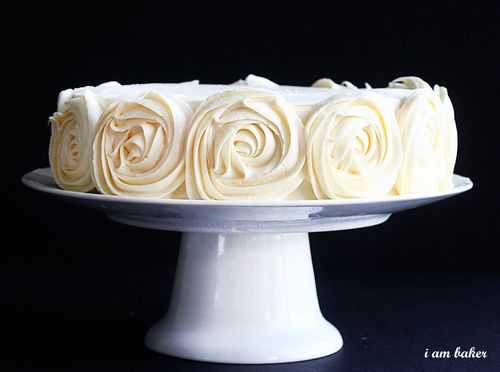
IMG_9024.stamp
This is how it looks after completing the circumference of the cake.
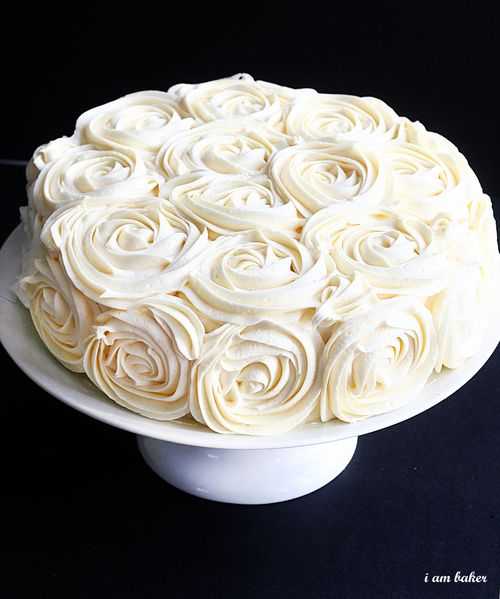
IMG_9038.stamp
Then go back and add the roses to the top using the same method.
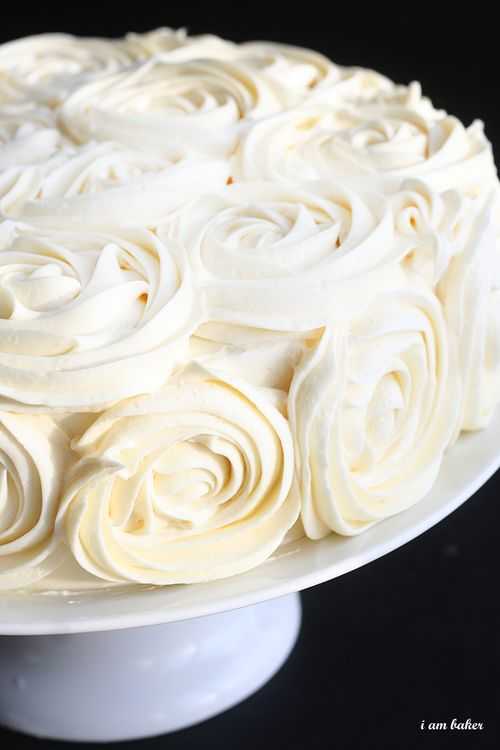
IMG_9030.stamp
When making flowers that big, you are bound to have some ‘dead’ space in there. Can you see that big empty spot up there?
My first instinct was to go back in and add dollops of stars… but I think I found a better way!
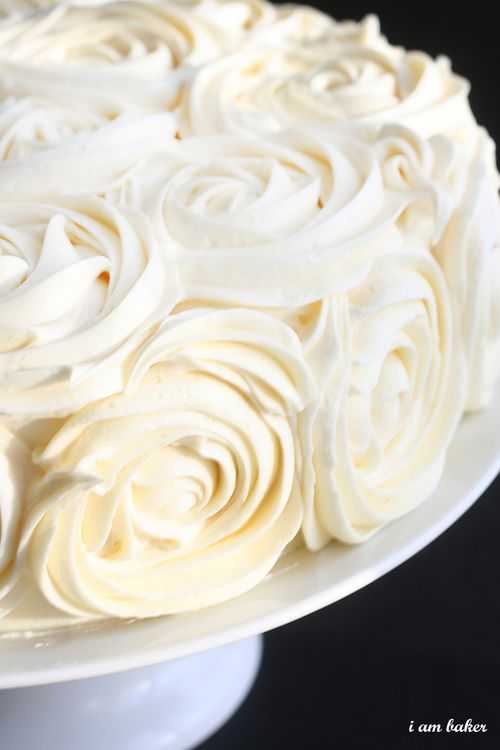
IMG_9031.stamp
Instead go in and make a swoop with your tip. (try and go in the same direction as the rose right next to it)
In the overall design it seems to fit in better then the star dollop!
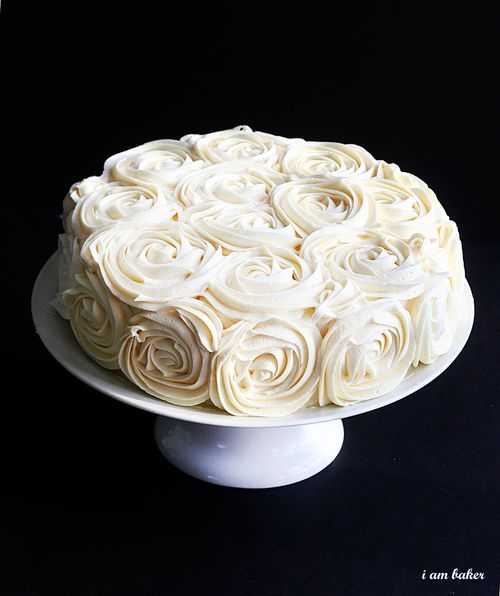
IMG_9043.stamp
At least, I hope so anyway. :)
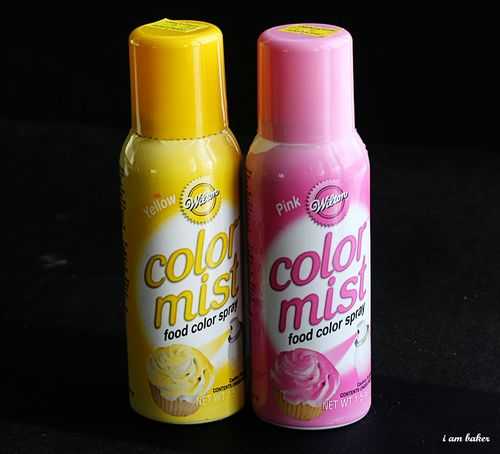
Now… if you are really adventurous and want to add some color to your cake…
IMG_9045.stamp
You can pick up some of these.
IMG_9052.stamp
I did a light dusting of yellow then went back over it with the pink. I have to admit, all white is still my favorite, but I love the flexibility of being able to add some color.
I think a deep red would be stunning on a Valentines Day cake! If you try that, be sure to send pictures! Or just add it to my flickr group!
Here are my tips to finding success:
1. Use a good crusting buttercream recipe. I used my new favorite and loved how it worked. You will want to make sure the frosting is not creamy though… for the tutorial cake I used a creamier version and the roses did not holdtheirshape as well.
2. Make sure you have enough frosting! Those roses use a lot… I would make the whole batch of the above recipe.
3. Put your cake in the fridge after you are done with decorating to help them set up and retain their shape.
4. Have FUN with it! Those roses are so forgiving. But if you find that you really dislike how they are turning out, just scrape them off and start over!

...and then some

Hydrangea Cupcakes- glorious treats
Hydrangea bushes are in full bloom all over my neighborhood right now.  I love all varieties of hydrangeas, but my favorite is this traditional shaped, blue-purple color.  I picked a few this weekend and brought them inside as inspiration for cupcakes.  I’ve seen cupcakes that resembled hydrangea flowers before, but I’ve never given it a try.  It was much easier than I’d imagined and I was very happy with the results!
Directions
I made a batch of my favorite chocolate cupcakes (recipe here), and my vanilla cream cheese frosting (recipe here).  Then I colored half of the frosting blue, and half purple (mixing a few shades of blues and purples to get a good color match to the real hydrangeas).  When making the frosting, use very little cream (less than 1 tablespoon), because the coloring will add some liquid, and you need the frosting to be pretty stiff to hold a nice shape.
If you’d like to match other hydrangeas, you could certainly use other color options, like light blue and medium blue, or two shades of pink.  But I do think that frosting these with two colors (instead of just one) really added to the effect.
I filled my piping bag with the two colors of frosting, side by side.  Once your bag is filled (1/2 to 2/3 full), you may want to just squeeze some frosting into a bowl, until you see both colors coming out.
Then, using a Wilton 2D tip (a large closed star tip), I piped large, loose star shapes around the edge of the cupcake, and then filled in the center.  If the frosting starts getting too soft (no longer holds a nice shape), then put the whole bag of frosting in the fridge for 15-20 minutes to let the frosting to firm up a bit.
Now I want to plan a pretty tea party just so I can make these again!

Monday, July 23, 2012

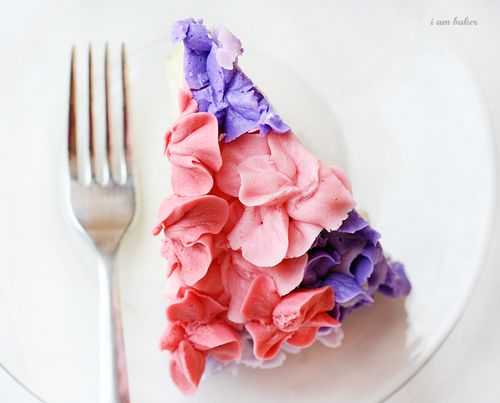
hydrangea cake

Hydrangea Cake Tutorial- i am baker

Just in case anyone wanted to make their own Hydrangea Cake, here a a couple quick tips to make it easier for you!

*Some inspiration:* 

IMG_6492.grandmaart 
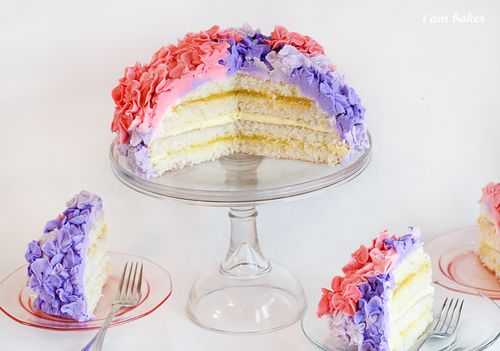
First, I baked my cake. I just did a regular white cake with the lemon curd filling and lemon frosting. (Seriously delish.. and perfect for spring or Mothers Day!)
I used 8in pans then carved around the edges to make my 'bouquet' shape.
You can also bake cake in round pyrex bowl or basketball cake pan or something round.IMG_6281.stamp 
I then covered the cake in buttercream frosting and chilled it in the fridge.
For the flowers, I used the rest of my buttercream, making sure the consistency was on the thicker side. Pick the colors that you prefer, and create three of four variations for your petals.
IMG_6288.stamp 
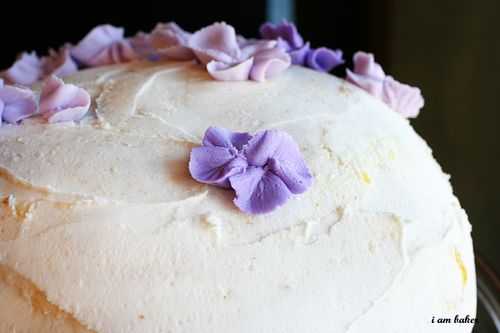
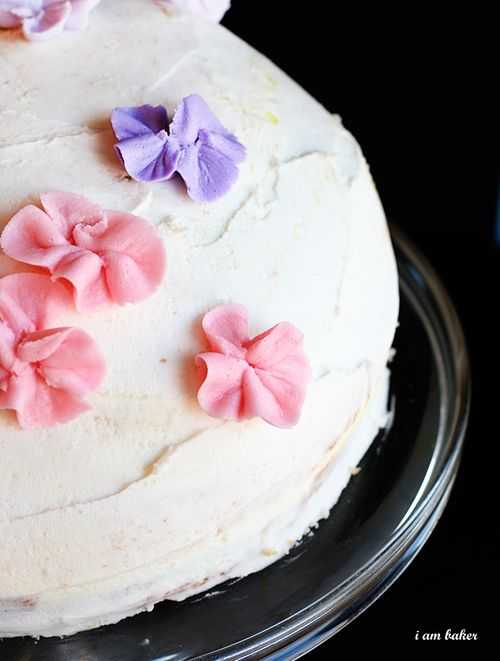
Using a #104 tip with the small edge out, I just piped out four petals to each flower.
I think the actual hydrangea petals are a bit more flat, so if you can master the tip you can create a more realistic looking petal!
(This was my first time trying this flower… I am hoping to improve more for next time… I also want to make this cake in white and pale pink… cant you just see it???)IMG_6292.stamp 
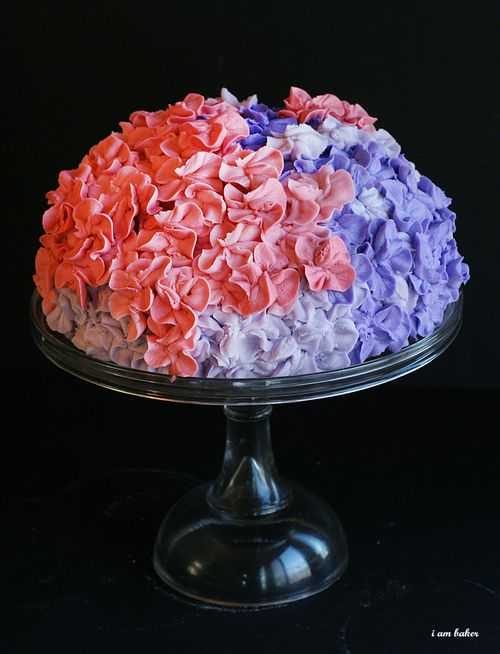
I started with one color in one section then made a bunch of flowers overlapping each other again and again.
Then went back in with another color and started adding more flowers. Anytime I saw a flower that I didnt think was good enough I just added a new one on top of it!IMG_6299.stamp 
This is a really forgiving and easy technique… you really cant go wrong!
And when you are all done, you get this…
IMG_6311.stamp

IMG_6546.stamp

IMG_6573.stamp 


This is a white cake (recipe here) with lemon curd filling and lemon frosting covered in buttercream crumb coat and buttercream hydrangea's.

Basic White Cake (adapted from Joy of Baking-great site!)
 
2 large eggs separated
1 3/4 cups sifted cake flour
2 tsps baking powder
1/4 tsp salt
1/2 cup room temperature butter
1 cup sugar
1 tsp vanilla extract
1/2 tsp almond extract*
1/2 cup milk
1/8 tsp cream of tartar

*I love the addition of almond extract, but you can certainly leave this out for a more pure vanilla flavor.  The original recipe does not call for it.

Directions:

Separate the eggs, placing the whites into one container and the yolks into another. Let come to room temperature.

Preheat oven to 350 degrees.  Butter and flour two 8in (I used 9in) pans.  Normally I use PAM, but this recipe really calls for the butter and flour method.  Just trust me on this one.

Put sifted flour, baking powder, and salt into a bowl and set aside.

Using an electric mixer ( I love that this recipe calls for an electric mixer as I do not even own a KitchenAid Mixer), beat the butter until soft and creamy, about 1 minute.  Add 3/4 cup of sugar (reserving the rest) and beat for an additional 2 minutes.  Now add egg yolks, one at a time, until completely incorporated.  Add vanilla and almond extract until combined, about 30 seconds.

Now you are going to add your flour mixture and milk.  Starting with the flour, add 1/3 of the mixture and mix until incorporated.  Now add 1/2 milk mixture, mix until combined.  Add half the remaining flour, combine. 

Now add the rest of your milk and combine.  Add remaining 1/3 of your flour mixture, and go ahead and mix until combined.  This whole process should take less then 2 minutes, as you do not want to over beat the batter.

In a separate clean bowl with clean whisk attachment, whip eggs whites until foamy then add the cream of tartar. (I did this on medium speed) Beat until soft peaks occur, and then gradually add in your remaining sugar. 

You will want stiff peaks, which took me about 3 minutes.  Now, take your rubber spatula and fold your eggs whites into your cake batter.  Make sure they are fully incorporated, but do not over stir the batter, as you do not want to eggs to deflate.

Put batter into prepared pans and bake for 20-25 minutes.

Cakes are done when an inserted tooth pick comes out clean or with very few crumbs.  At this point I place the cakes directly into the freezer and leave them there for at least an hour.  This locks in moisture and also makes it easier to frost.

Lemon Frosting ( both recipes adapted from allrecipes.com)
2 cups confectioner's sugar
1/4 cup butter, softened
1 tablespoon fresh lemon juice
1 tablespoon milk

In large bowl beat confectioner's sugar, 1/4 cup butter, and lemon juice until smooth.

Add milk as needed, combine until ingredients are fully incorporated and light and fluffy.

Lemon Curd Filling

1/2 cup fresh lemon juice
1 tablespoon cornstarch
6 tablespoons butter
3/4 cup white sugar
4 egg yolks, beaten

In medium saucepan, mix together lemon juice and cornstarch until smooth.
Add butter and sugar and bring mixture to boil over medium heat. Stir constantly for one minute. In small bowl use a whisk to beat egg yolks until smooth. Add in a small amount of the hot lemon mixture to the egg yolks. (this is tempering the eggs) Now pour the egg mixture back into the sauce pan, whisking rapidly until fully combined.

Reduce heat to low and stir constantly until reach desired thickness. Don't let it come to a boil again! (takes about five minutes)

Refrigerate for at least two hours.

Make sure its cool before adding to cake. Its a good idea to make this ahead of time so your cake assembly can be easier!

I made my favorite buttercream frosting for the flowers, and I used the entire amount! So even though the recipe is for a large quantity, I used it all.

I just separated it into three bowls then added pink, light purple, and dark purple to each bowl respectively.

This cake is truly delicious. Moist. Full of different flavors and taste bud tingling sensations.

Can you just imagine it at a bridal shower or even as miniature centerpieces at a wedding???


**this post is a combination of posts from i am baker

Thursday, July 19, 2012

summer beauty

Summer Strategies for Your Beauty Routine
By Ayren Jackson-Cannady

Your hair, skin, and nails need a break as much as you do. Here, tips on how to cut back on primping to let your natural beauty shine.

Hair

Why it’s stressed-out: Many things that make summer fun for you are really tough on your hair. “Ultraviolet rays, salt, and chlorinated water compromise its outer layer, allowing moisture to seep out,” says Paradi Mirmirani, a dermatologist in Vallejo, California. Also, you’re probably sweating more—and therefore shampooing more—which further robs hair of hydration. (This is especially true if your shampoo has a high pH. Does your hair feel squeaky-clean after washing? Chances are you’ve got a high-pH shampoo.) Top that with all the stuff you’re using to manage your hair under these harsh circumstances—including heated tools and stylers that contain dehydrating alcohols (like SD alcohol 40, ethanol, propyl, and isopropyl)—and you’ve got a recipe for dull, fried hair.

What you can skip: First, shampoo every other day or less. On days you don’t wash your hair, just use a dry shampoo—which comes in either spray or powder form—to freshen hair, give it body and texture, and absorb oil at the roots without leaving it parched. A good one is Living Proof Straight ($29, livingproof.com). Another benefit: Using dry shampoo allows you to go longer between heat-styling sessions. On days that you do shampoo, afterward simply run a dollop of leave-in conditioner through your towel-dried hair from midshaft to ends. This will give you light hold plus some extra hydration, and you can forgo your usual styling products, says Matthew Preece, the owner of the Fred Segal Salon, in Santa Monica. Many leave-in conditioners are water-based (which means they’re gentle on hair) and use nonstripping alcohols, like lauryl alcohol, cetyl alcohol, and stearyl alcohol. One to try: Dove Hair Nourishing Oil Care Leave-In Smoothing Cream ($6 at drugstores).

Spa treat: To give your hair even more of a reprieve, try an apple-cider-vinegar rinse, which can be used once a week to deep-clean hair and make it shinier. Dilute ½ cup apple-cider vinegar with 1½ cups water, add a few drops of lavender essential oil to mask the smell, and pour the mixture into a spray bottle. Spritz the concoction onto dry roots and massage it into your scalp. Leave it on for five minutes, then rinse thoroughly. 


Skin

Why it’s stressed-out: Cleansing too frequently or harshly (as you tend to do when you’re sweating a lot) can strip away three components of your skin that keep it moisturized—natural oils on the surface, ceramides (or fats), and natural moisturizing factors (NMFs), which are substances that retain water from inside the body, says Jeannette Graf, an assistant clinical professor of dermatology at the Mount Sinai School of Medicine, in New York City. Without them, your skin won’t be as effectively hydrated, and the natural process of cell turnover may slow down, leaving skin dry and dull.

What you can skip: To start, sidestep your morning cleanser. Hopefully, you didn’t sleep in your makeup, so you don’t really need to lather up. Instead, splash your face with water and apply sunscreen or, if that’s too oily for you, a light moisturizer with an SPF of 15 or higher. Evening-only cleansing will suffice for most, except those with very oily or acne-prone skin. If your skin is normal to dry, once a week throughout the summer eliminate your evening cleanser, too. If you’re wearing makeup, remove it gently with a wipe, such as Neutrogena Make Up Remover Cleansing Towelettes Hydrating ($7 at drugstores). And while you’re (not) at it, after your once-a-week, water-only wash in the evening, skip any moisturizer you might normally use. This may help reduce oiliness during the day and prevent clogged pores, says Mona A. Gohara, an assistant clinical professor of dermatology at the Yale School of Medicine. If you can’t fathom a night without moisturizer, at least downgrade to a light lotion or a serum, applying to dry areas only. Try Dior Hydra Life Skin Protect ($65, dior.com).

Spa treat: “A mask of plain full-fat yogurt and oatmeal can help replenish moisture and exfoliate all skin types,” says Stephanie Tourles, a holistic aesthetician in Orland, Maine, and the author of Organic Body Care Recipes ($19, amazon.com). The treatment also cools and calms overheated skin, red skin, and heat rash. Mix ½ cup of each ingredient, leave the mask on for 10 to 15 minutes, then rinse. Repeat up to three times a week. 


Nails

Why they’re stressed-out: “Research has found repetitive and prolonged wetting and drying of fingernails to be a probable cause of splitting nails,” says Nia Terezakis, a dermatologist in New Orleans and a clinical professor of dermatology at Tulane University. Not only are your hands more likely to get wet frequently in the summer but, because this is mani-pedi season, you may also be spending more time at the salon having your cuticles pushed back with metal instruments. Bad news here: Those tools can scrape away the microscopic protective cells on the nail surface that keep nails hydrated, supple, and strong.

What you can skip: Although it’s hard to resist those coral fingertips, says Kim D’Amato, the founder of Priti Organic Spa, a natural salon in New York City, “in warmer weather I often recommend getting a salon manicure less frequently and just buffing nails in between appointments for a quick, healthy, high-shine look.” For optimal results, buff your nails only in the direction they grow, not back and forth, using a buffer that’s soft to the touch, not gritty like a file, says Terezakis. Another quick, easy way to ensure that nails stay healthy and strong? Pop a biotin pill (try the Vitamin Shoppe Biotin, $7 for 100 capsules, vitaminshoppe.com). This B vitamin has been shown to improve nail quality. (Of course, talk to your doctor before taking any supplements.)

Spa treat: “Sugar scrubs hydrate nails and help remove dry skin from around the nail beds,” says D’Amato. Mix 2 cups sugar with 1 cup olive oil, which is high in antioxidants and nail-strengthening vitamin E. Rub the mixture all over your hands, paying special attention to your cuticles. Remove it with a warm washcloth after 15 minutes.


Body

Why it’s stressed-out: Guess what happens to your skin when you submerge yourself in water repeatedly. Some of the stuff that keeps it in good condition is washed away. On the surface of your skin, there is a normal presence of bacterial flora, such as staph epidermis and corynebacteria, which play a key role in maintaining proper skin function, says Jeanette Jacknin, a dermatologist in Scottsdale, Arizona.

What you can skip: For starters, trade in your long, hot showers for quick, lukewarm ones. And in place of regular body moisturizers, body creams, and thick balms and butters, use one good antioxidant-packed product in the evening only. This will help limit the impact of free radicals, which are unstable molecules that can cause skin aging. (During the day, sunscreen will supply sufficient moisture.) One of the latest go-to antioxidants? Sea buckthorn. Try Fresh Seaberry Restorative Body Cream ($28.50, fresh.com for stores). The fast-absorbing formula makes this cream quick and easy to apply.

Spa treat: Once a week, do a wet body scrub using a gentle ayate (cactus fiber) exfoliating cloth (available at health-food stores). Mix 1 cup olive oil, 1 cup of a natural exfoliant, such as sea salt, sugar, or coffee grounds (summer bonus—the caffeine in coffee is said to improve the look of cellulite), and a few tablespoons of honey for extra hydration. Before you step into the shower, lightly rub a small amount of the mixture into your skin, beginning at your feet and working your way up. After you’re finished, rinse with warm water and pat your skin dry. Put on lotion only if your skin feels tight.


Feet

Why they’re stressed-out: Not only are sandal-clad feet exposed to the elements—wind, sun, and sand—which can be drying, but the repetitive pounding of your heels on pavement (in flip-flops or bare feet) can also cause calluses to form, which may lead to painful cracked skin. Worse, those refreshing sprays and lotions meant to deodorize feet can cause bacterial and fungal infections between the toes if used too often: Bacteria thrive in moist areas, says podiatrist Eric Reynolds, a foot and ankle surgeon in Jersey City.

What you can skip: Ditch the spritzes and sprays. When possible, give the flip-flops a break in favor of breathable high-tech socks or cotton socks and sneakers. And resist the temptation to have a salon technician take a razor to your callused heels. The treatment may feel satisfying, but it’s frowned upon by doctors, since micro-tears in the skin are the perfect breeding ground for infections. Instead, exfoliate in the shower with a gentle foot file, such as the Tweezerman Glide Away Foot File ($10, tweezerman.com).

Spa treat: For a refreshing foot bath, soak your feet in brewed and cooled black tea for 30 minutes to minimize perspiration and odor. Tea contains tannins, plant polyphenols that can act as an astringent and help reduce sweating, says Graf. The tannins in tea may also reduce odor.


so... whos with me? home spa day!
 

Tuesday, July 17, 2012

cloud house

Living in the cloud: The Cloud House by McBride Charles Ryan
Perspective of the house

from a distance

perspective

interior shot

the old house kitchen

the old house